
Running a Beer Game for a handful of students is straightforward. Running one for an entire MBA cohort, a corporate seminar, or a multi-campus class is a different challenge — but it doesn't have to be a stressful one.
Over a hundred universities and companies use Zensimu to run sessions ranging from a single team of four to events with 500+ players in parallel. SDA Bocconi, for example, runs a yearly contest with 500 students across multiple campuses.
This guide walks through everything you need to plan, run, and debrief a large Beer Game session smoothly — including helpful features like auto-expanding teams and auto-assigned roles, which remove the biggest sources of last-minute friction.
How big can a session go?
Short answer: bigger than you probably need.
On the technical side, the platform is cloud-based and fully scalable, so you can expect the same responsiveness whether you're running 4 players or 1000 in parallel. No lag, no drop in performance.
To make large sessions easier to manage, we provide PowerPoint slides and onboarding videos you can share with participants at the beginning of the session. Walking students through the rules and the interface beforehand dramatically cuts the number of questions you'll get during the game.
For larger groups, note that it can help to have multiple facilitators:
For in-person events, with everyone in the same room, questions tend to come individually and need to be answered quickly to avoid blocking a team. A ratio around 1 facilitator per 50-100 players keeps things moving.
For remote events, questions naturally funnel through chat, so one facilitator can handle more participants without anyone feeling stuck. So here a single instructor can easily manage 100-200 players at the same time.
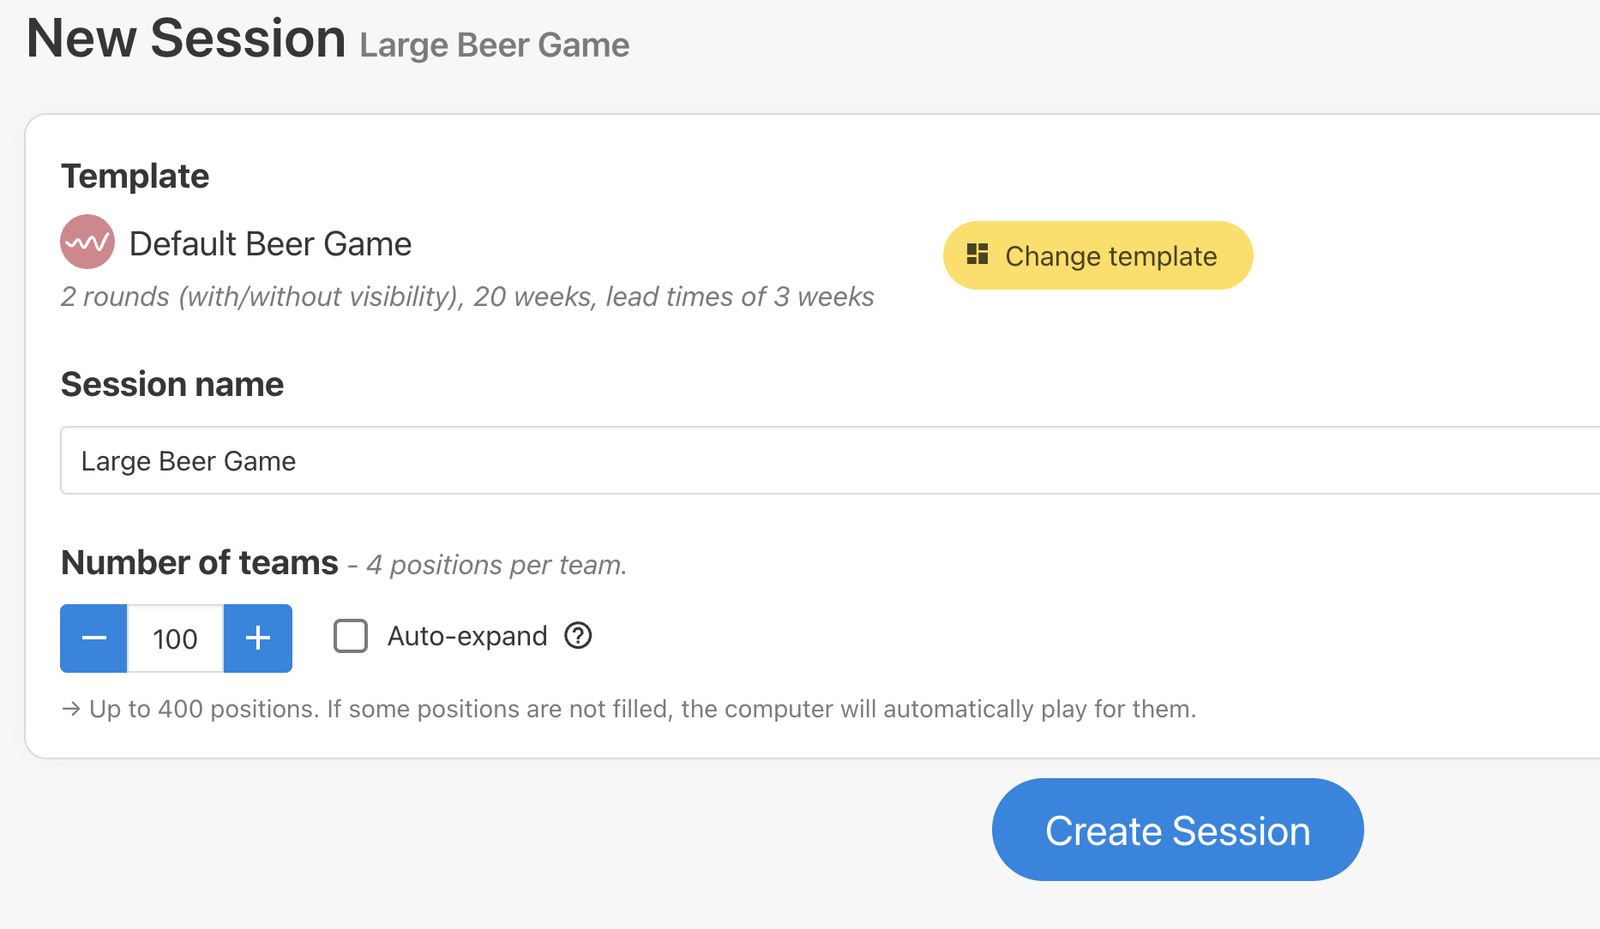
1. Plan your team structure
The classic Beer Game uses four players per team (Retailer, Wholesaler, Distributor, Factory). Decide how many teams you need based on your total headcount.
For example, with 100 students playing four-per-team, you'll create 25 teams.
 When playing in-presence, you can also decide to have 2 participants playing a role together, sharing a computer screen. In this case, the application will only count one position, even if several people discuss each order. Note that this setup tends to make decision-making a bit longer and we recommend a maximum of 2 persons per role, in order to ensure everyone is engaged in the decision-making.
Computer players
In case you don't have an exact multiple of 4, or in case of no-shows, the platform has a built-in safety net. When the game starts, the Computer automatically takes over any unfilled roles, so that all teams can play seamlessly.
Computer orders mimic human decision-making (basic "net stock" calculation), you can read more about it in our documentation.
New: auto-expanding teams
In large sessions, your final attendance is almost never exactly what you planned. A few no-shows, a few unexpected drop-ins, a colleague who brings their group from the next class — it adds up fast.
With the new auto-expanding teams option, you don't have to guess. Set your initial number of teams a bit below your estimate (ex: half), and the session automatically creates additional teams to fit everyone. This reduces the number of "computer players" and avoid any interruption to add capacity manually.
2. Invite your participants
You have three options, depending on how much control you want over role assignments.
Option A - Share the session lobby link
The fastest method: copy the lobby link or the session code to be entered on zensi.mu and share it on the projected screen, by email, LMS, or in the video call chat. Students land on the list of available games and either pick a position or click "Join a Random Position".
Best for: classes where you don't care who plays which role.
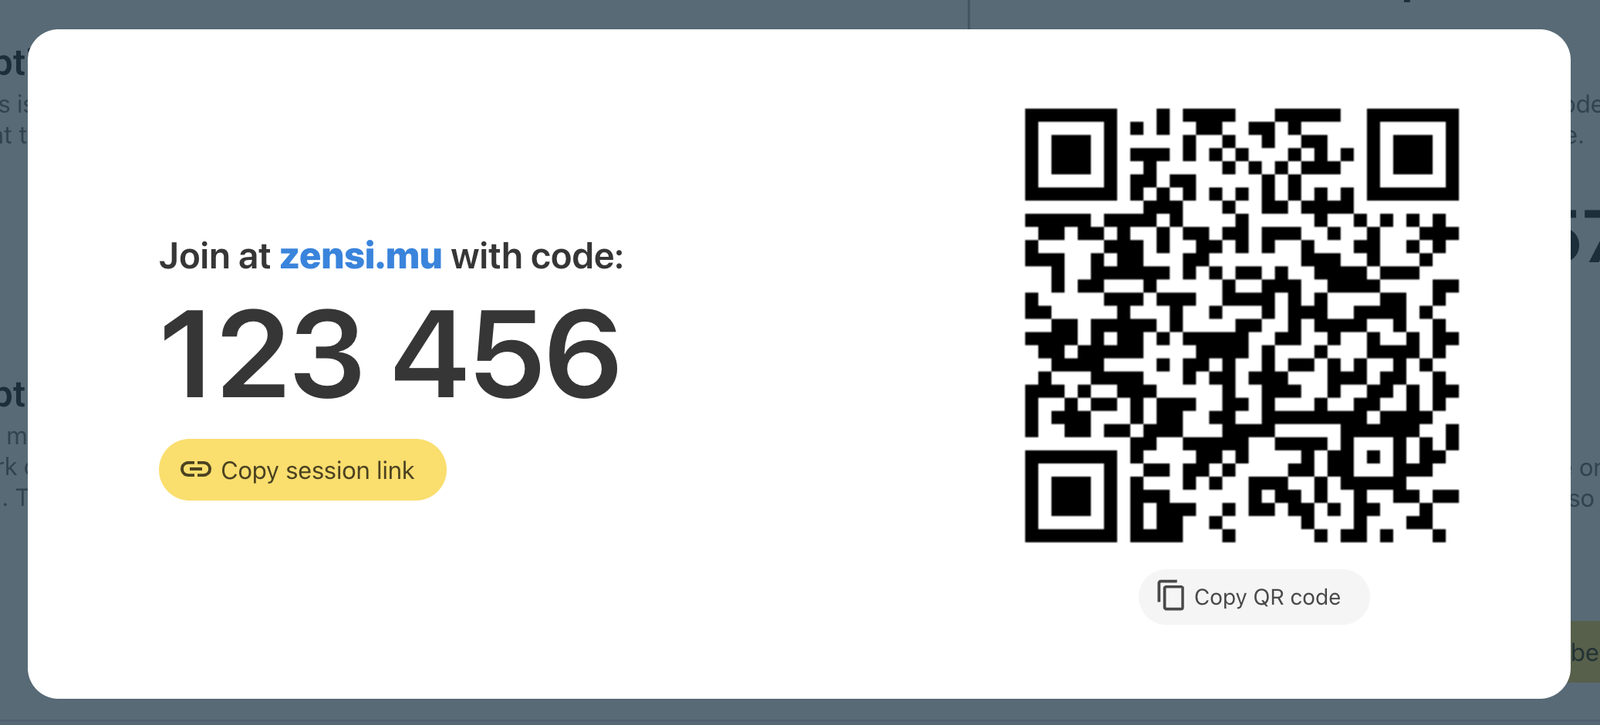
In the session advanced settings, you can set up the role selection to "Auto-assign only". In this case, a single "Join Session" button is shown and players are assigned randomly.
If you want players to communicate with their teammates during the second game round, you can:
activate the player chat so they can communicate within the game interface,
let them find their teammates in the room and sit next to each other before round 2 starts,
in a video call, activate breakout rooms and let players join the room based on their team number
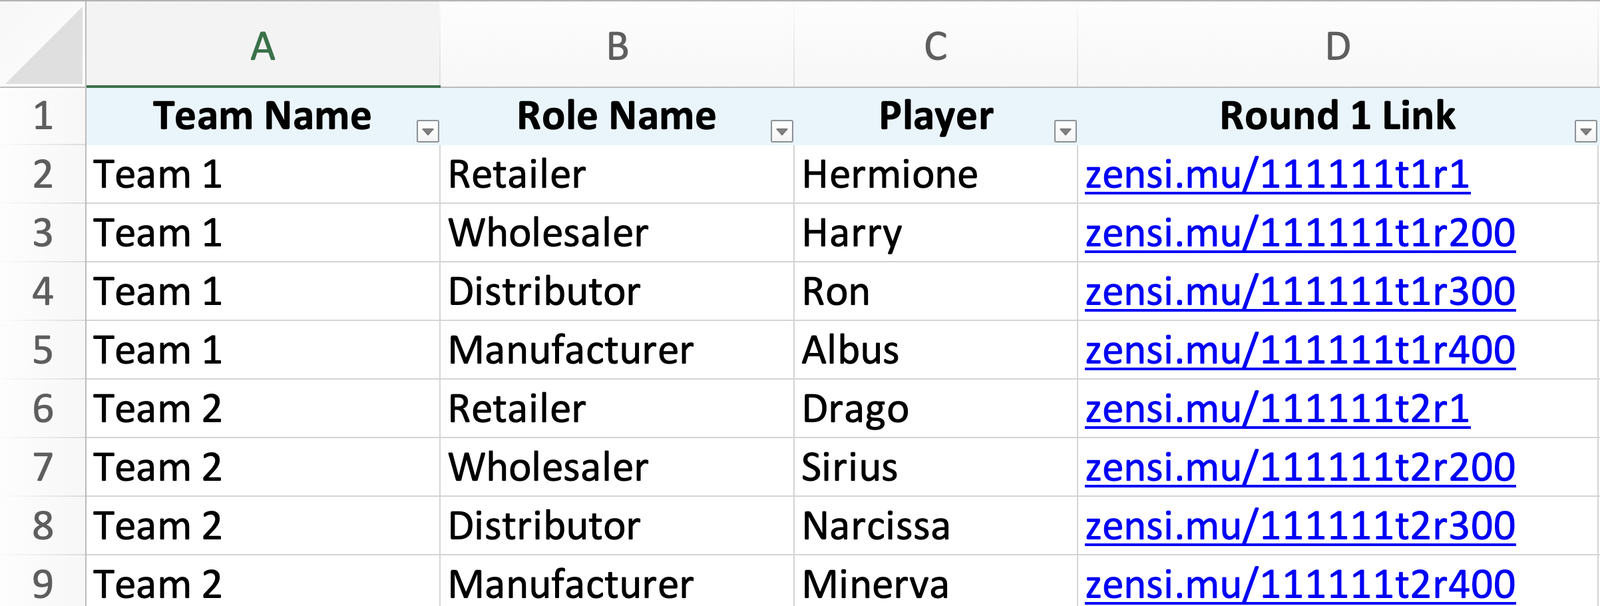
Option B - Assign roles via spreadsheet
Export the role links to Excel, fill in student names next to each role, and send the file out (or mail-merge individual emails). Each student gets a unique link that places them in their assigned position.
Best for: graded sessions where you want to track who played which role, or when role balancing matters.
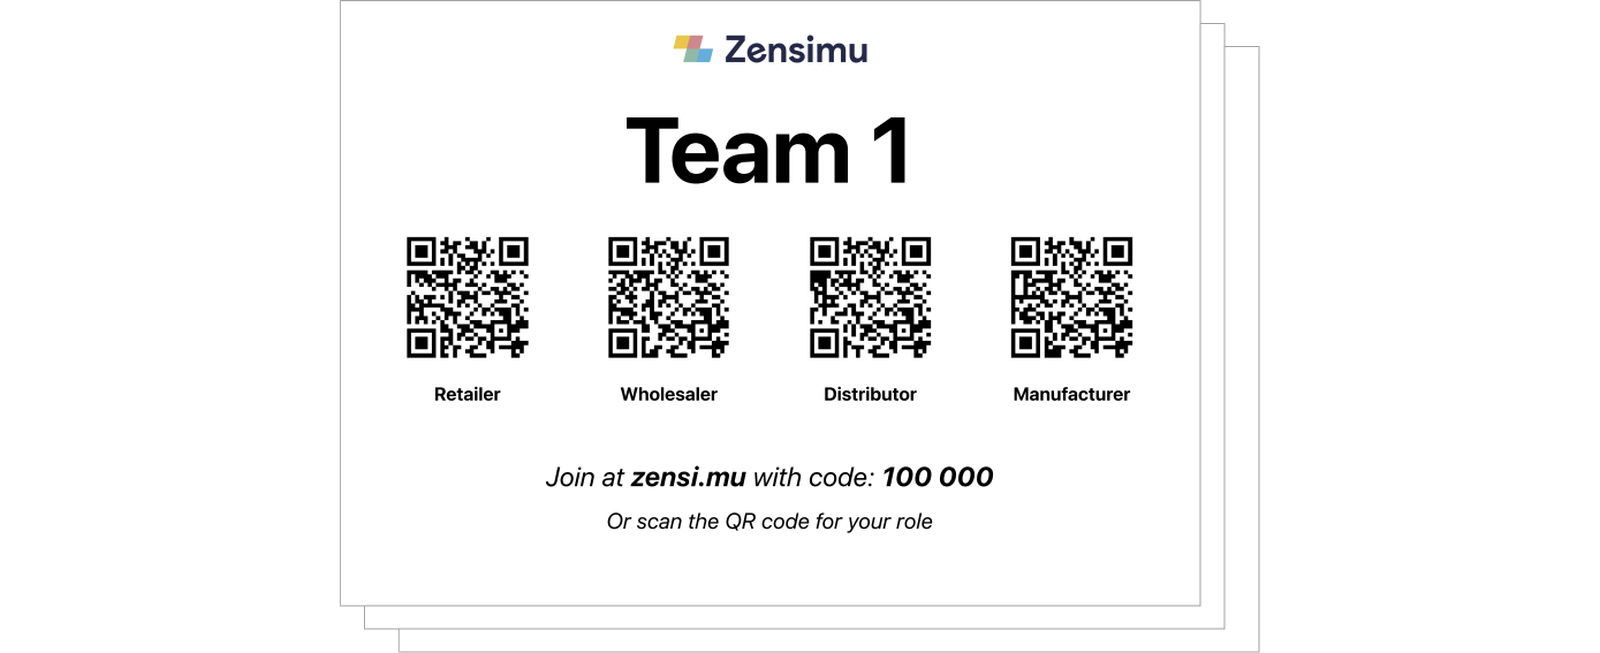
Option C - Assign roles via printed label
For in-person games, you can print a label for each team from the session invite settings. These labels can be put on tables in the conference room before the session starts. As a result, players will be assigned to a team based on where they sit. This solution allows team members to be immediately seated next to each other, making collaboration easier in the second round.
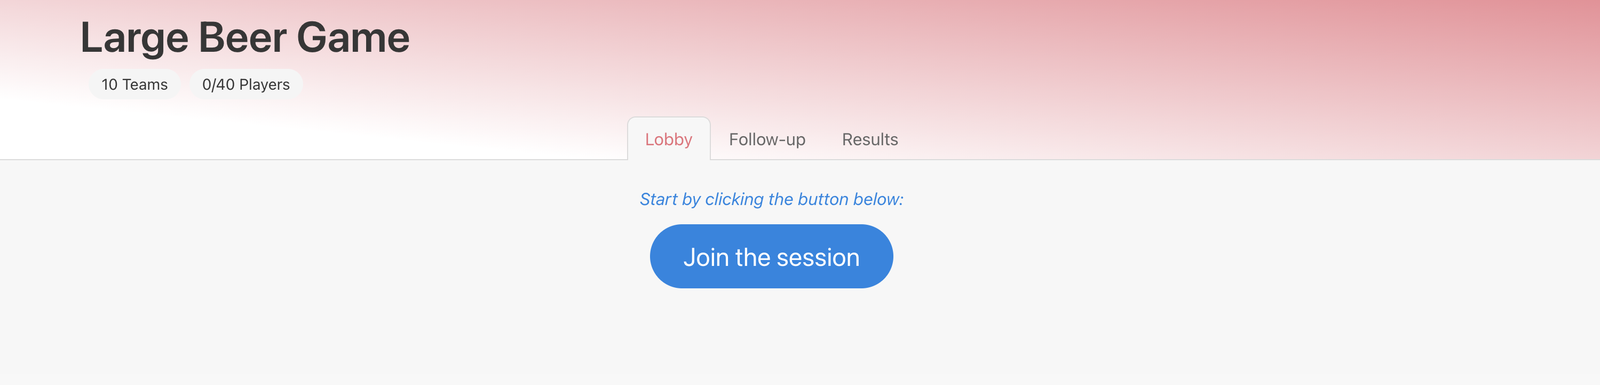
3. Monitoring the games in real time
Once the session is live, the follow-up page is your command center. At a glance, you can see:
which players and teams are connected;
the current week/turn of each game;
whose orders are pending and whose are submitted;
which games are advancing faster or slower than the rest.
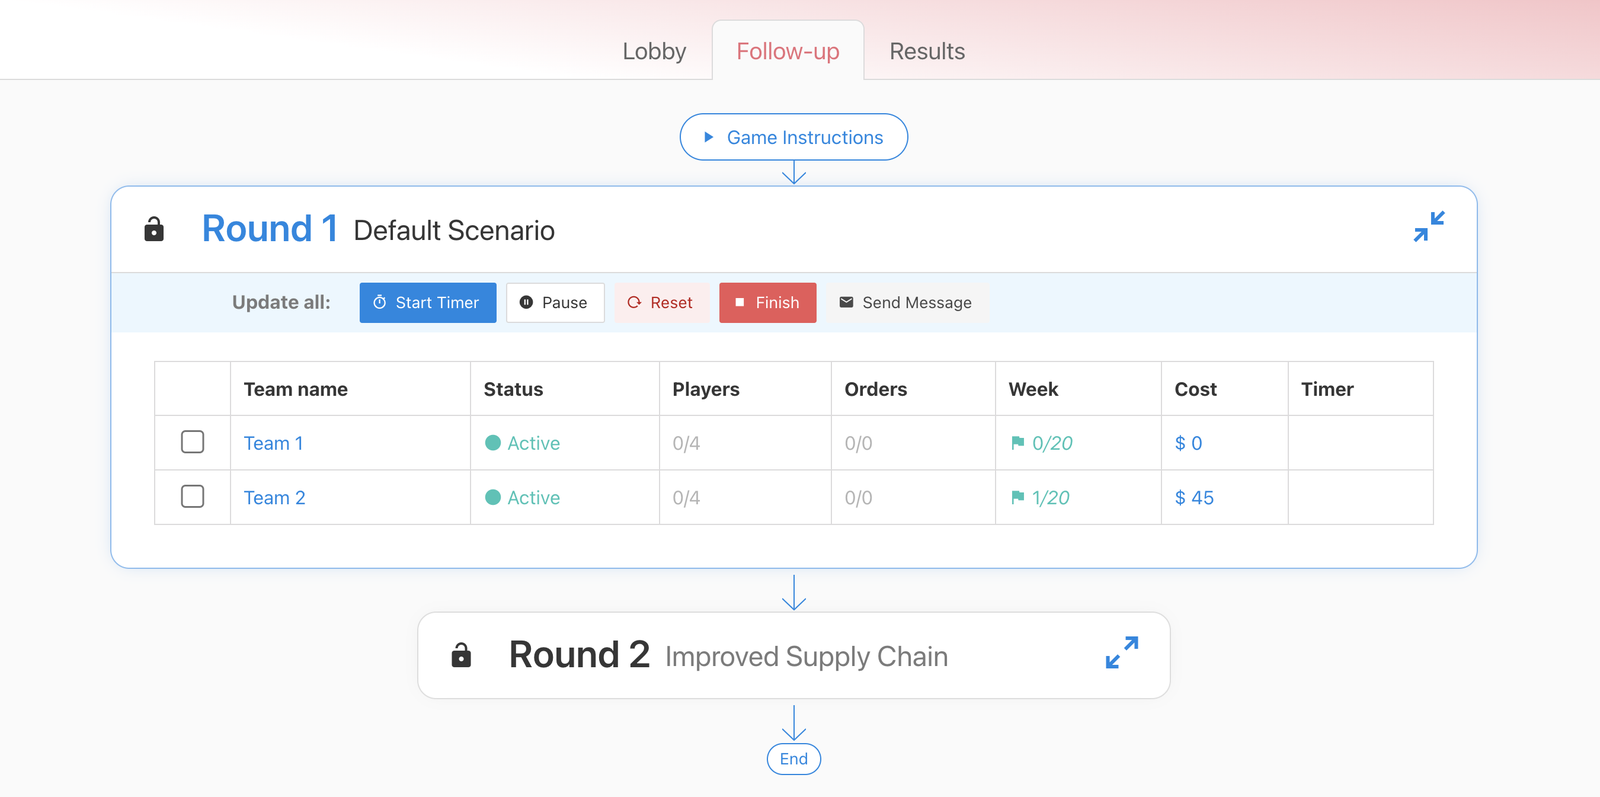
You can also access helpful menu actions to help you manage the progress:
Keeping games in sync with the timer
In large sessions, some teams will inevitably move faster than others. Two tools help you keep things aligned:
Activate the timer to enforce a maximum time per turn. If a player doesn't submit in time, the Computer plays for them and the game progresses to the next week. The timer duration is set in the game's settings.
Apply the timer selectively to slower games only, so faster teams aren't penalized while stragglers catch up.
You can also pause and resume individual games if you need to deal with a specific issue without disrupting the rest of the session.
Sending a message
In case you need to send additional instructions or ask specific players to order faster, you can select specific teams and players and click on "Send Message". The message will popup for the concerned players directly within the game interface.
Pause Games
At the beginning of the game, you can keep the games Paused. This ensures no player can start ordering while their teammates are still joining their positions.
You can also Pause games in the middle of the session if you need to deliver key learnings to everyone, or if you want the faster teams to slow down a bit while waiting for the others.
Lock Rounds
At any time, you can "lock" a game round. This prevents players from joining the games for the concerned round. For example, you can keep the round 2 locked while the debriefing of round 1 is ongoing, to ensure players only join round 2 when the timing is right.
4. Debriefing at scale
A debrief for 25 teams is a different exercise from a debrief for one team.
Comparing teams and rounds
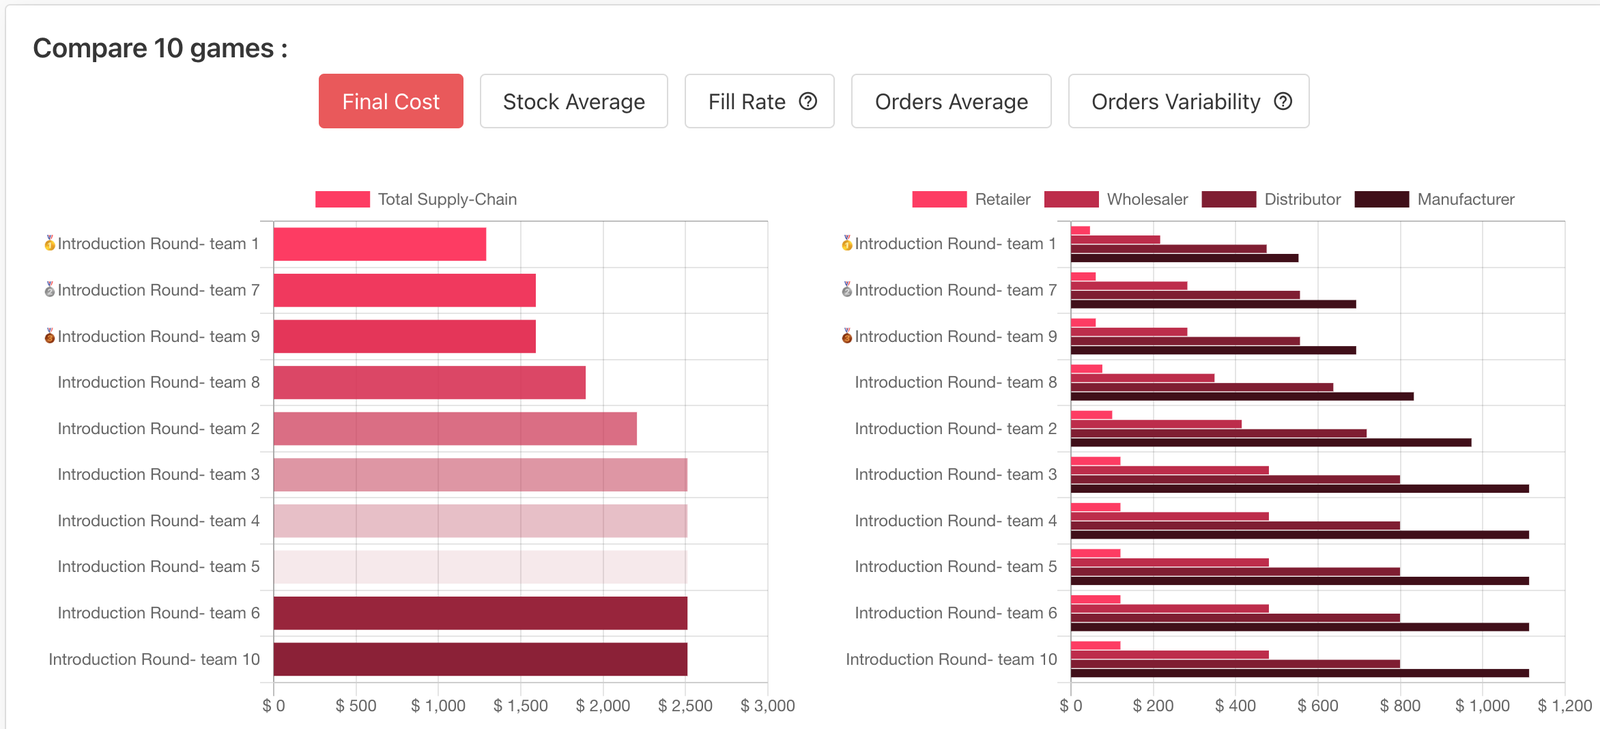
When all the games have been completed, use the “Results” tab of your session to compare the results of different teams at the same time. From there, you can officially select the winner after each game round. The average result is also shown, showing how in general teams improved their score between round 1 and round 2 (with more collaboration).
Gather feedback and discuss
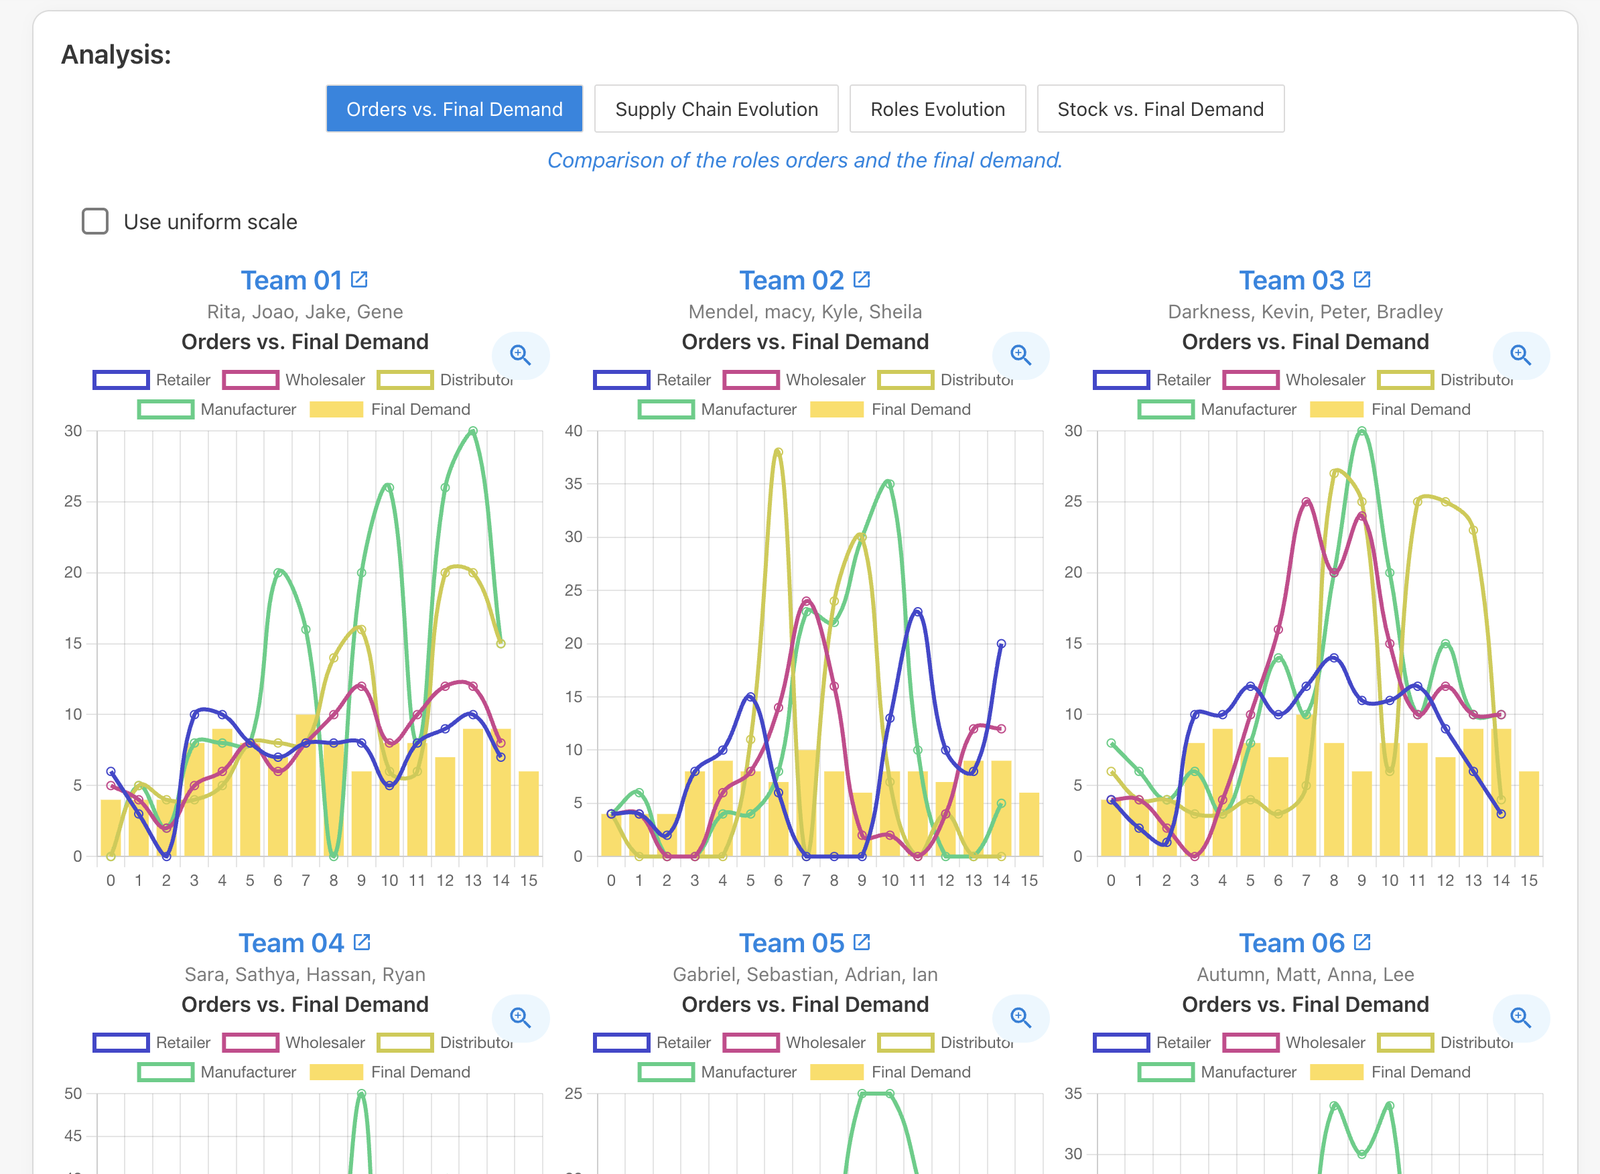
You can then display the evolution charts side by side, for example the comparison of Orders vs. Final Consumer demand. Open an interesting chart in full screen to zoom in on behaviors and show the bullwhip effect. Use these to animate a discussion about the players' difficulties and strategies.
Final words
Don't worry: you are ready.
Running a Beer Game for hundreds of players sounds intimidating, but in practice it's mostly about preparation and a few well-placed tools. Auto-expanding teams, the timer, the follow-up page and the Results tab handle the heavy lifting — your job is to set the stage and lead the discussion.
If you're planning a large session and want a second pair of eyes on your setup, book a quick call with our team — we run dozens of these every month and have seen what works.

